HOW TO GRID PORTRAITS
I remember last year reading the book how to draw LIFELIKE PORTRAITS from PHOTOGRAPHS, by Lee Hammond. I came to a chapter where she started explaining how to use a grid method to help draw your line art more accurately. After initially not being sure if I wanted to use a grid, I remained open minded and thought I’d give it a go. Then it hit me … how am I going to do this?
I had no idea. For a good couple of hours I searched online and tried to work out how to do it, the truth is, it was about a month or two until I got the whole system set up the way it is now. I kept changing it based on my experience. Below, are 8 steps I’ve found to work best for me; I really hope they help you too!
I now grid the lineart phase and then once I’m happy with the accuracy of the lineart, I remove the grid and do the rendering freehand. I only add this bit of information in, as if you wanted to grid the whole drawing from start to finish, including the rendering, the following steps may not actually be the best way to do it!
NOTE: Steps 1, 2 and 3 are only needed the very first time, or whenever you want to create a new grid of a different size.
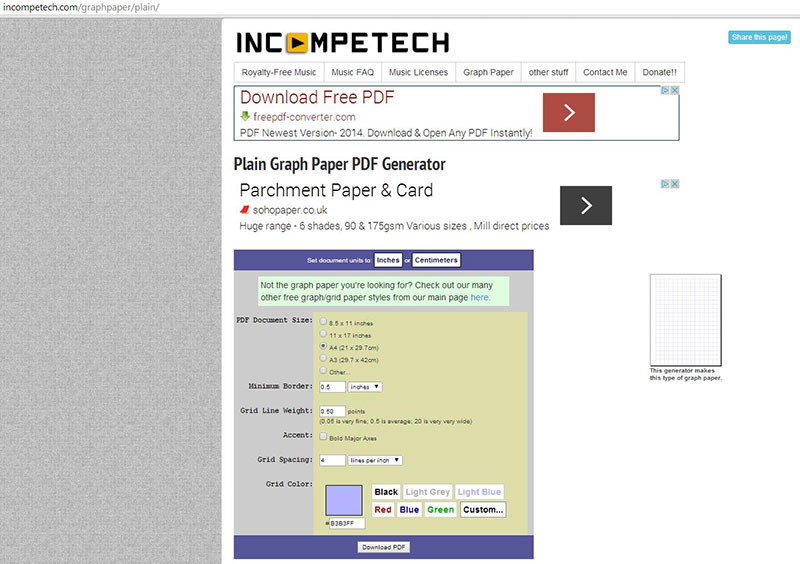
STEP ONE | PRINT OUT A GRID
First things first, visit this website and print out a grid. The website lets you fully customise: the size of the boxes, border, paper size and the strength of the line colour. It’s a fantastic tool for printing grids. I recommended printing out a few of various sizes, as some drawings may require a smaller/bigger grid. I normally use a grid around 1 inch squared for my A4 realistic pencil drawings.
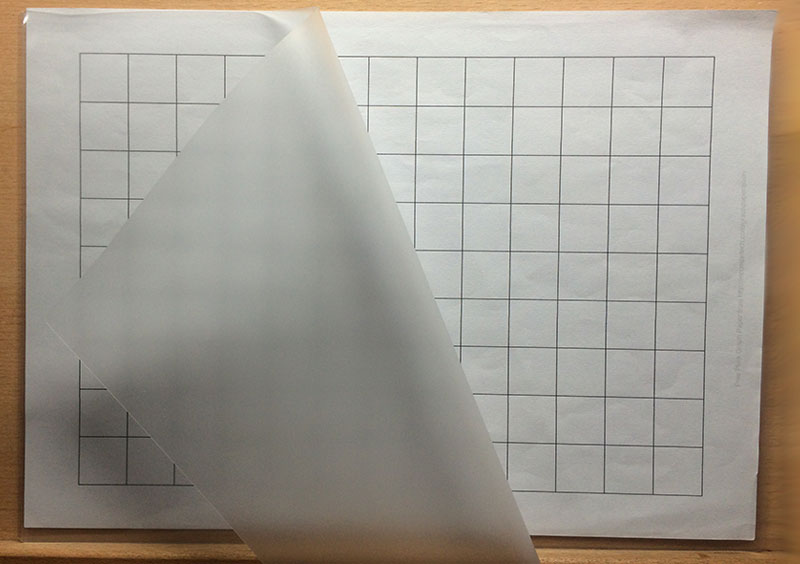
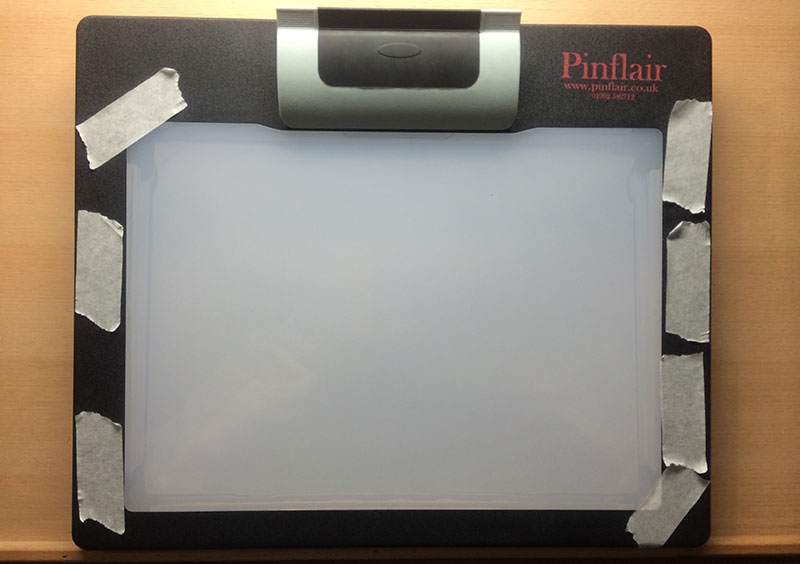
STEP TWO | PLACE GRID INTO A LAMINATING POUCH
Take your printed grids, and slide it into a laminating pouch. I use an A4 (about 8 X 12 in) pouch, but you can also get A5 (4 X 6) and A3 (16 X 12) pouches, or cut them up to any size. Laminating pouches work perfectly; just make sure you push the paper right up to the edge so it’s straight and not at all wonky before closing the front of the pouch!
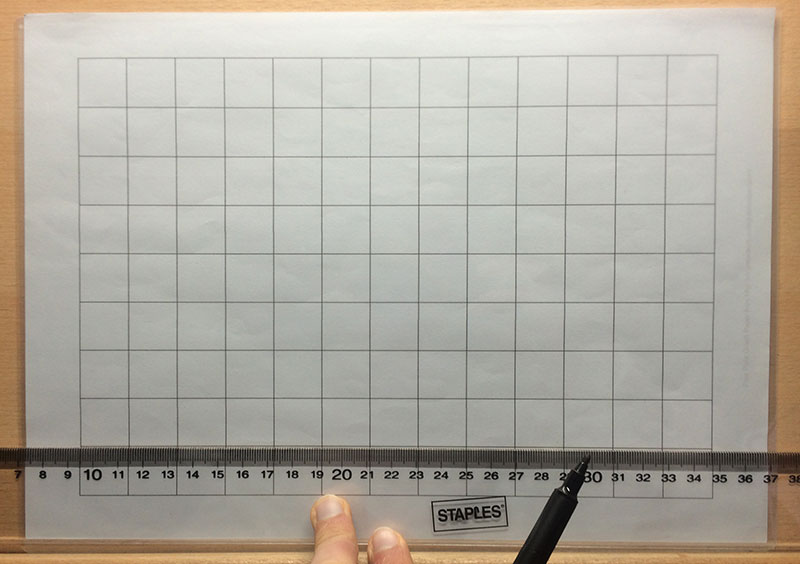
STEP THREE | DRAW YOUR GRID LINES
With the grid inside the laminating pouch, take a permanent marker pen, I used a CD/DVD pen. Copic markers don’t work, they just smudge all over the place lol With a ruler trace the grid you now have inside the pouch. You may want to tape the pouch down so that it doesn’t move about while doing this, and be careful moving the ruler to avoid smudging the ink.
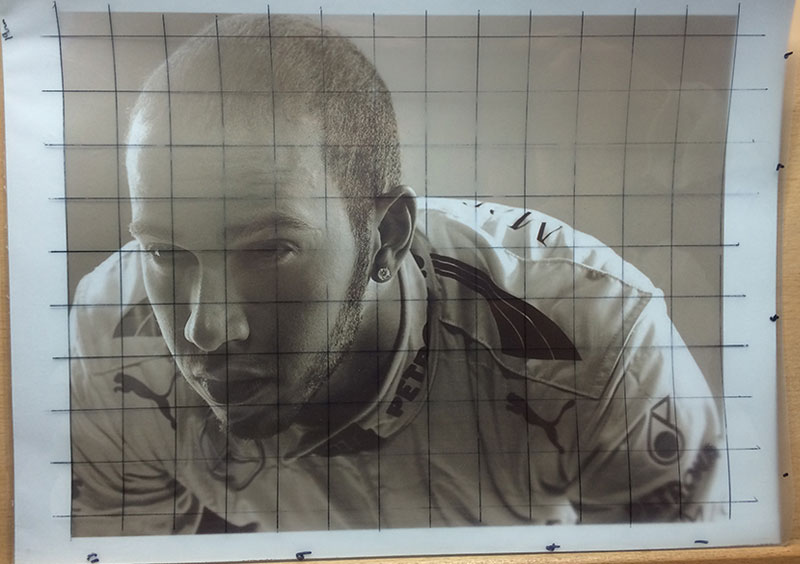
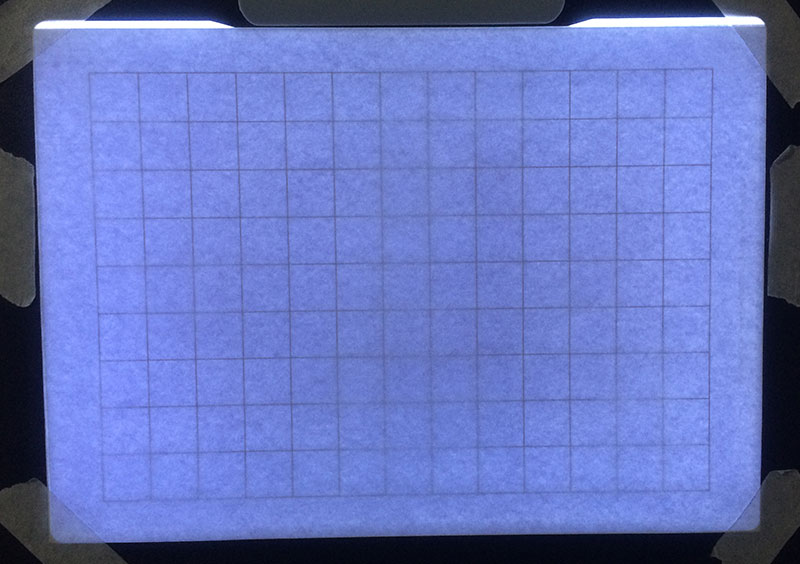
STEP FOUR | LINE UP REFERENCE IMAGE
Now, grab the reference image you want to draw, and place it inside the laminating pouch you’ve just drawn your grid on, so that the grid is shown over the top of the photo. Make sure that it lines up straight with the grid!
STEP FIVE | USE A LIGHTBOX
Before you can begin drawing your lineart, you need to have the grid visible on your piece of paper. At first I used to draw the grid on my paper very lightly and then erase the lines after. Problem was, no matter how lightly I drew the lines, I would always see them through my shading on the finished drawing.
It really bothered be, I honestly tried so hard to do the lines as lightly as possible. In the end I had to think of something else. This is what lead me to try a portable lightbox. It’s been very successful, as no lines of the grid will ever be placed on your drawing, plus you save time by not having to keep drawing the lines each time.
STEP SIX | LINE UP PAPER
I use Bristol Board paper, which is quite thick, but it still works! You want to line up your paper on the lightbox, with your printed grid underneath it so that you can see the grid through the paper. Make sure your paper is straight, then tape everything onto the lightbox.
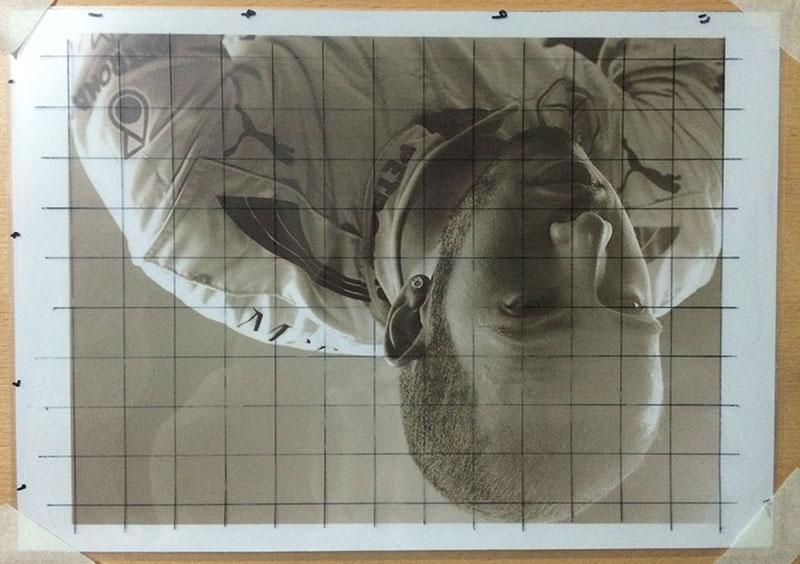
STEP SEVEN | TURN REFERENCE UPSIDE DOWN
This step isn’t totally necessary, but I personally find it easier to draw with greater accuracy when turning the reference image upside down. Upside down drawing is one of my recommended drawing exercises, where I explain why it helps with accuracy.
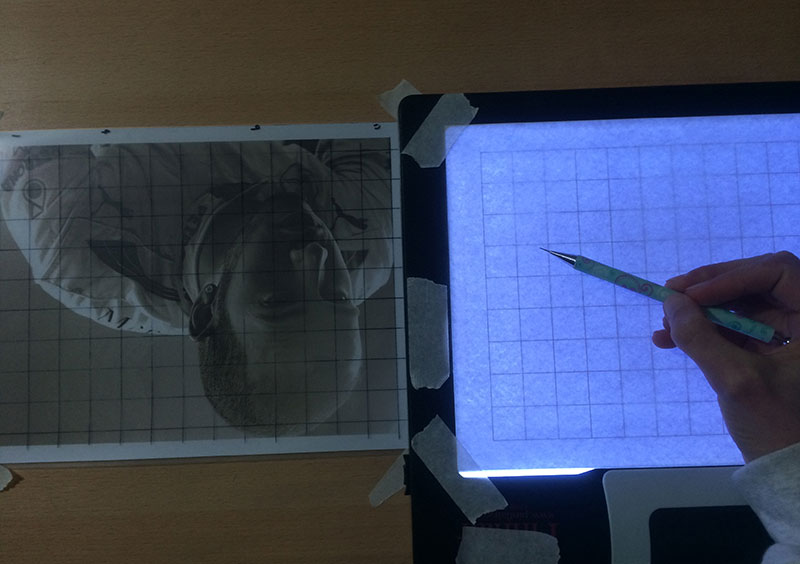
STEP EIGHT | START DRAWING
It may seem like a lot of work just to get going, but, it only takes a couple of minutes after the very first time. In fact, doing it this way is a lot quicker, and less hassle, then having to draw the grid by hand each time you start a realistic drawing.
I hope this little guide helps you in some way, it’s the way I’ve found best to grid my portraits after many months of trying different things that didn’t work! It’s now nearly 2017, and I still grid my realistic drawings this way.
ART ENABLES US TO FIND OURSELVES AND LOSE OURSELVES AT THE SAME TIME
– Thomas Merton